How to Create a Staging WordPress Site in Ecenica
Creating a staging WordPress site is a great way to test changes, develop new features, and ensure everything works perfectly before making updates to your live site. This article will guide you through the steps to create a staging sub-domain and then a staging copy of your WordPress site using Ecenica WordPress Manager.
Step 1: Creating a staging sub-domain
- Log in to cPanel.
- For help accessing your cPanel see Where do I log in to my hosting control panel.
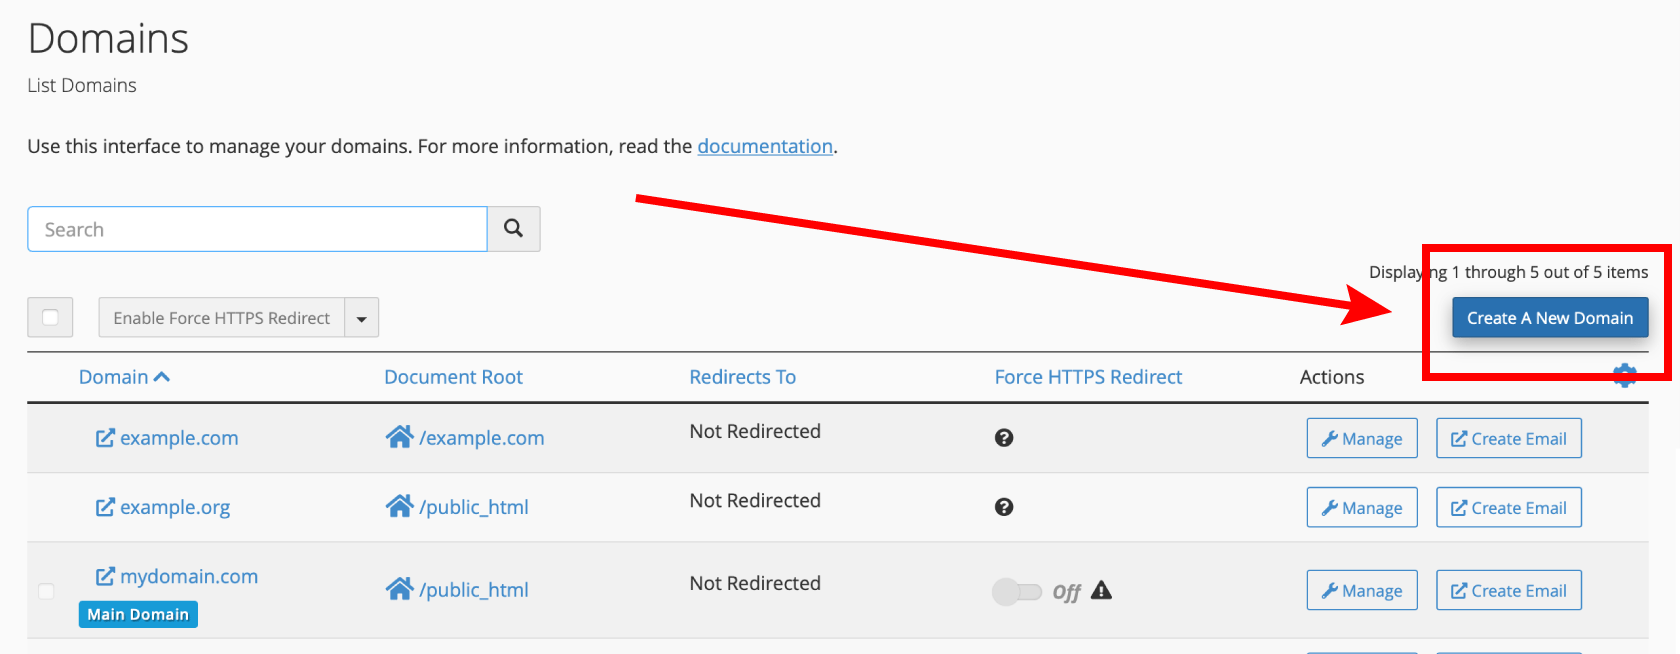
- Click Domains.

- Click Create A New Domain.
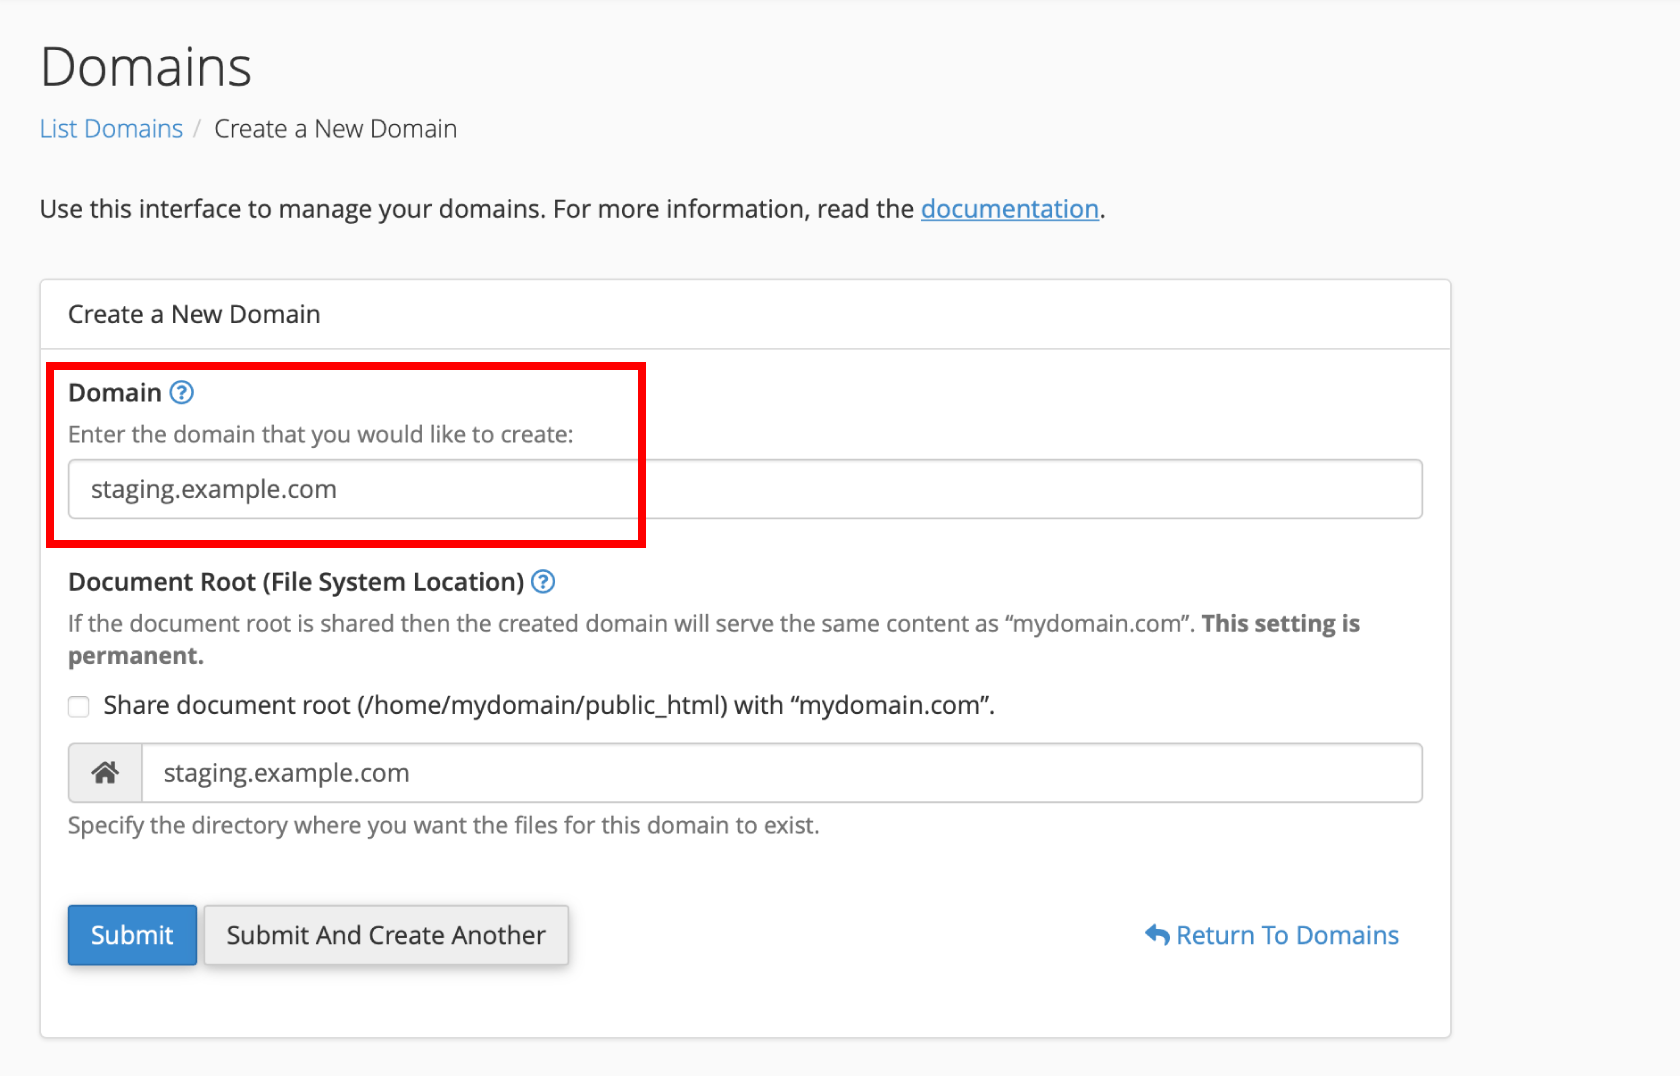
- Enter the subdomain you wish to create. E.g. staging.example.com. Click Submit
Step 2: Creating a staging WordPress site using WordPress Manager
- In Ecenica Dashboard. Click Manage next your Ecenica hosting service.
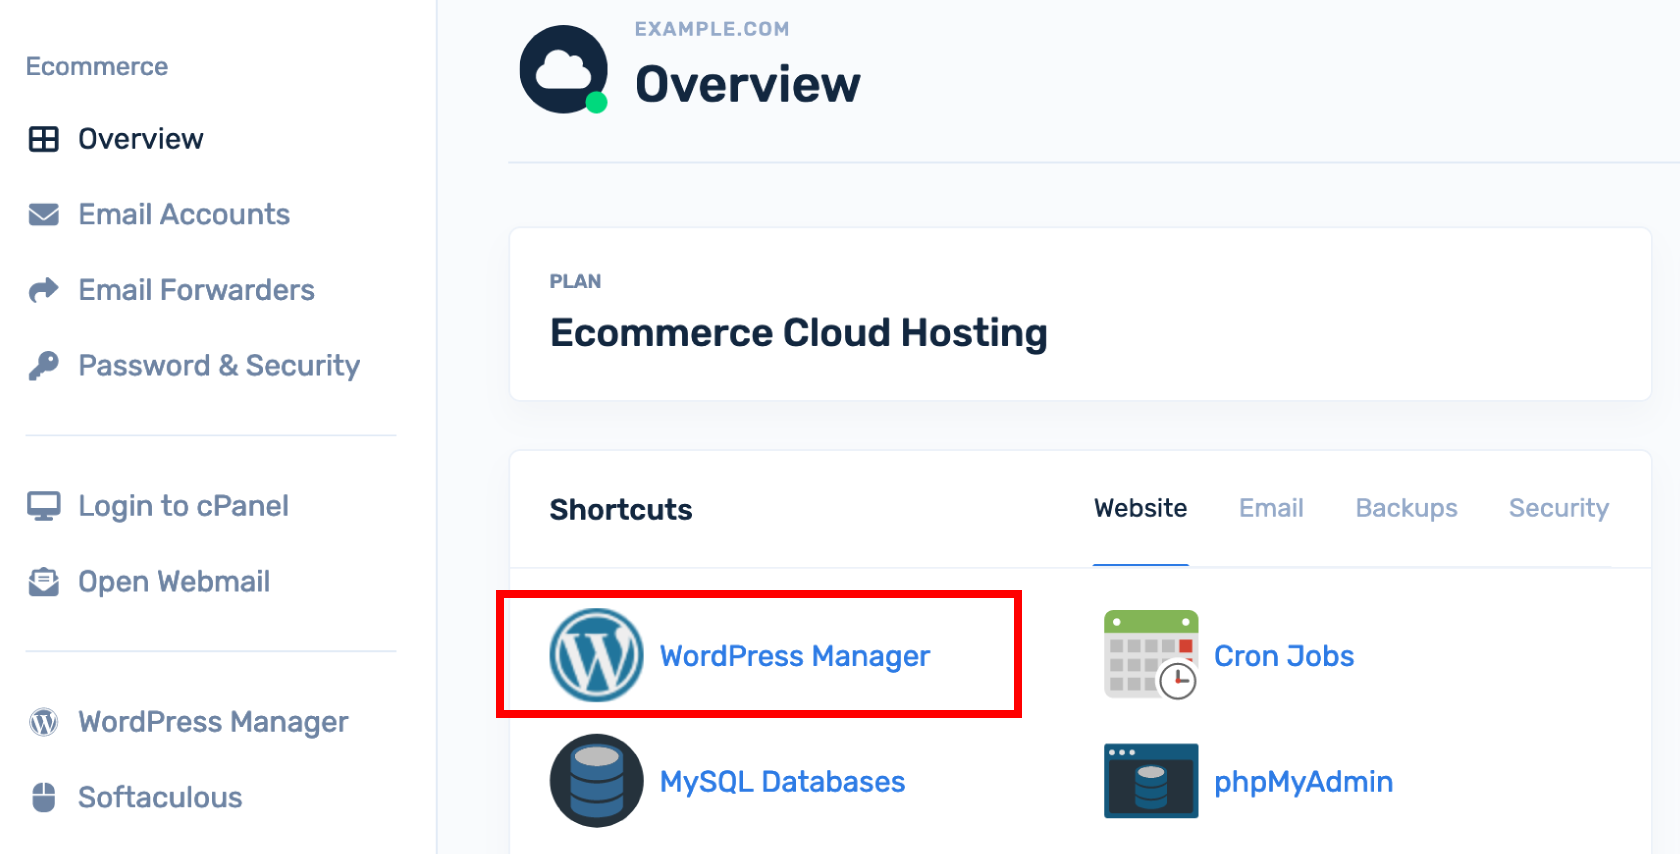
- Click WordPress Manager.
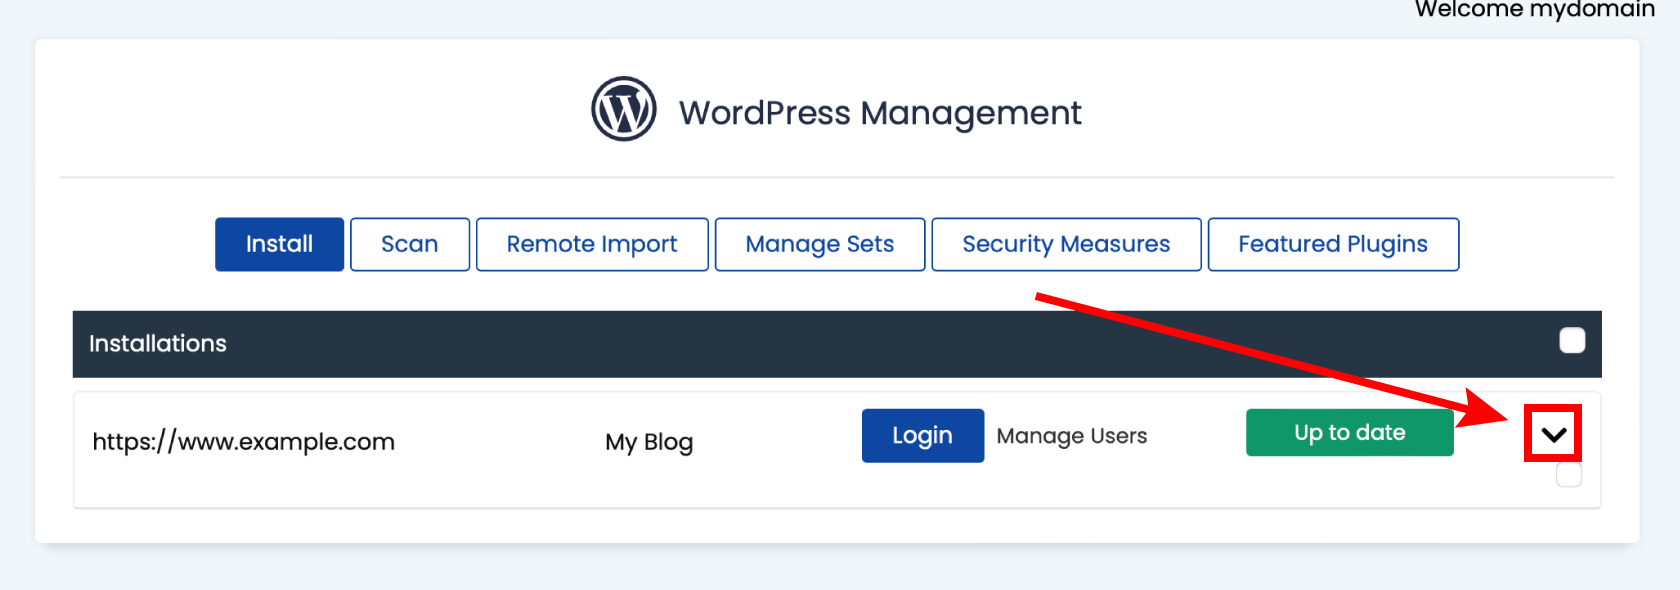
- Find your WordPress site and click the arrow to expand the options.
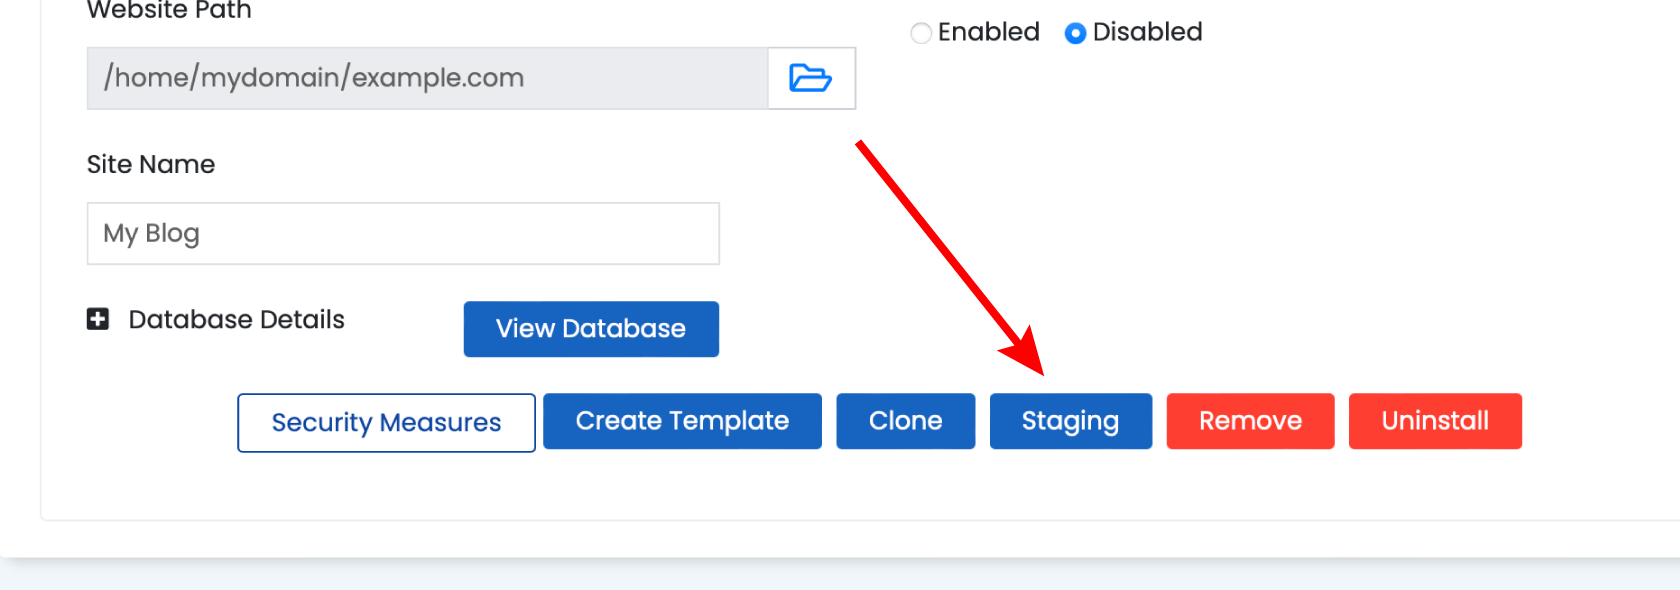
- Scroll down and click Staging
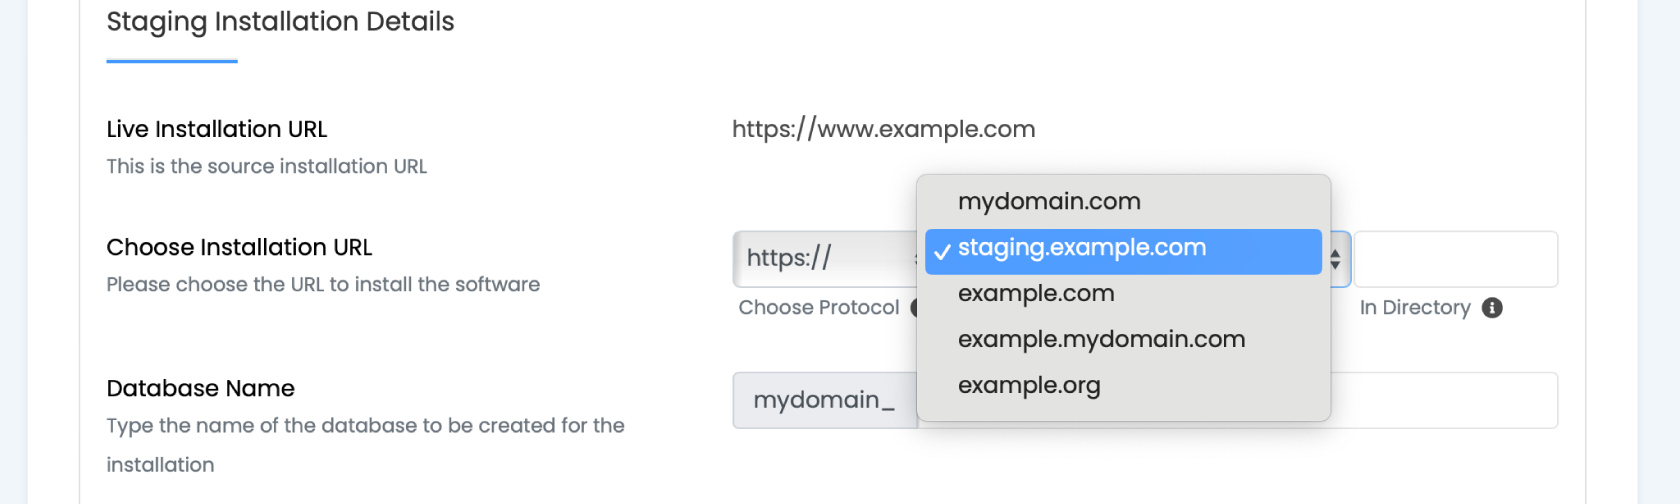
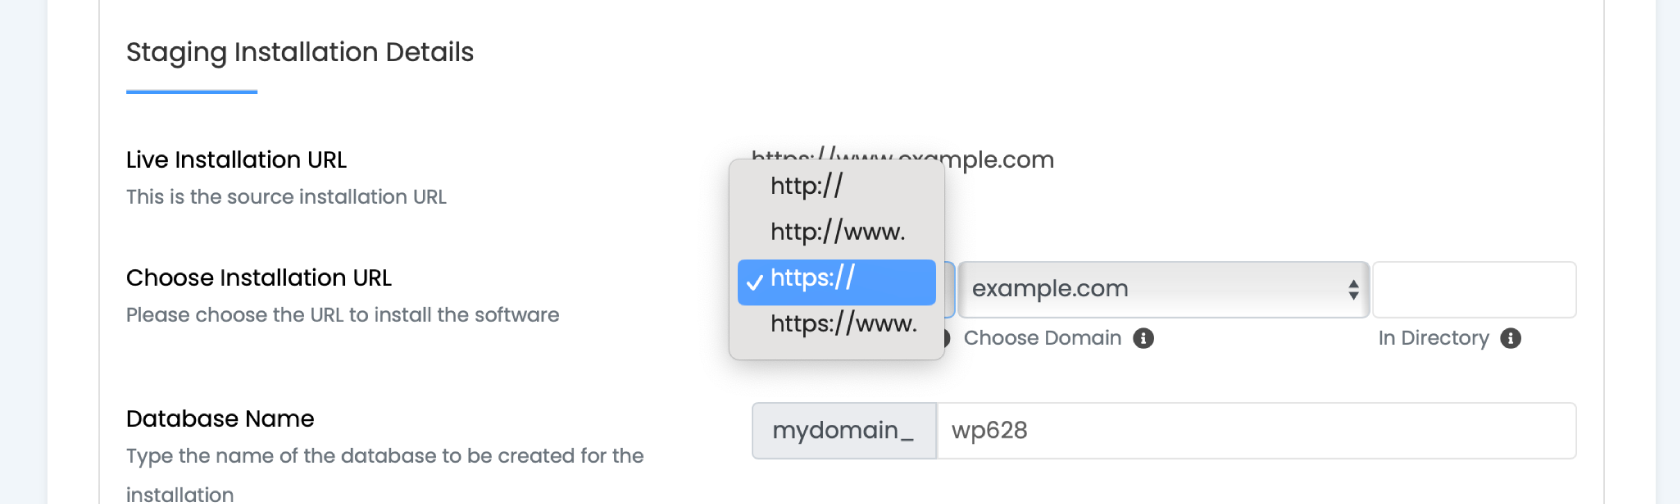
- Select https:// from the drop-down list.
- Select the sub-domain you created in Step 1 from the drop-down list.
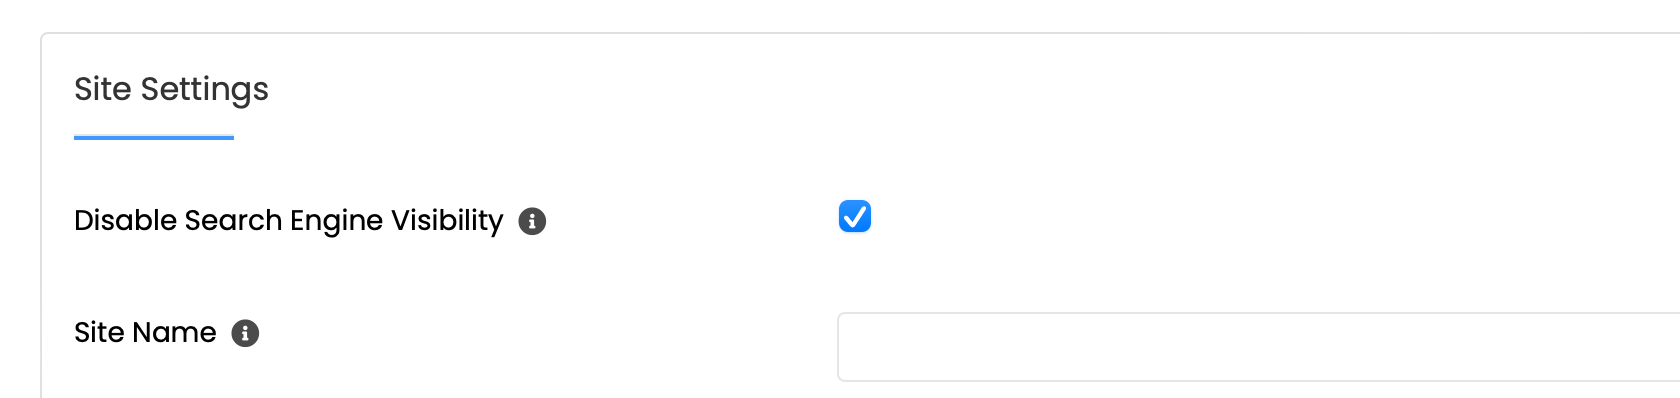
- Check the ‘Disable Search Visibility’ checkbox to avoid your staging site being indexed by search engines
- Click **Create Staging**

Step 3: Editing the Site
Once the installation is complete, you will see a success message with the URL to your new development site (e.g., https://staging.yourdomain.com) and the admin URL (e.g., https://staging.yourdomain.com/wp-admin).
Log in to your Staging WordPress Admin:
- Go to the admin URL of your staging site (e.g., https://staging.yourdomain.com/wp-admin).
- Log in with the same admin username and password you normally use to access your live site
Step 4: Push your dev site live
Once you’re ready to push your development WordPress website to your live domain follow How to Push your WordPress Staging site to Live to deploy your WordPress staging site on to live domain using Ecenica WordPress Manager.
