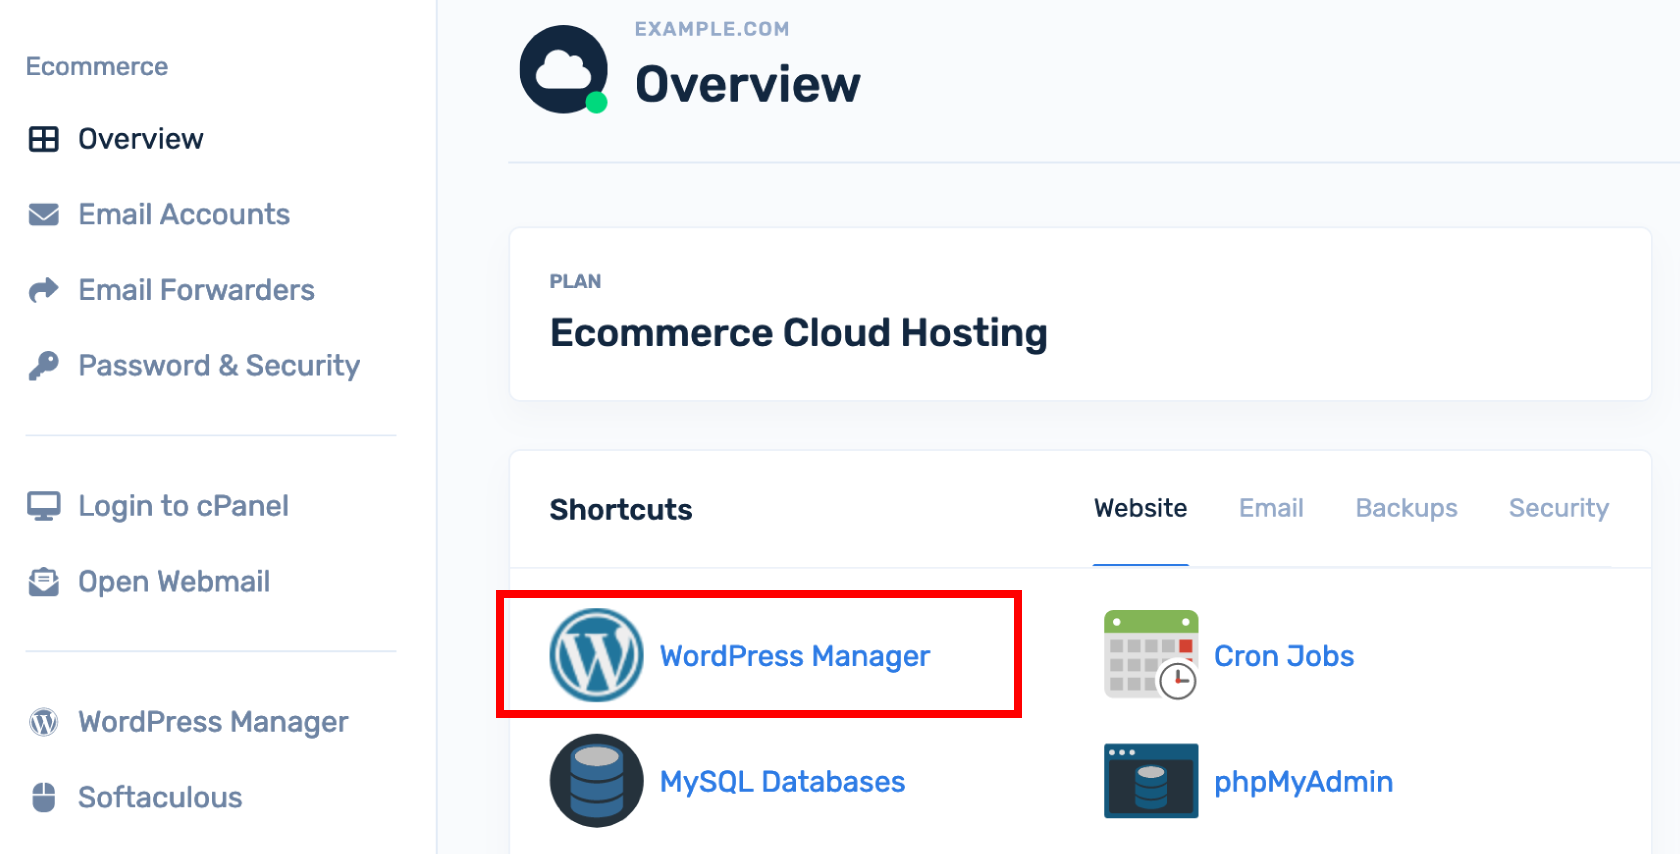
Learn how to seamlessly push your WordPress staging site live with this step-by-step guide. This article walks you through the process of transferring your staging site to your live environment.
Steps to push your WordPress staging site to live
- In Ecenica Dashboard. Click Manage next your Ecenica hosting service.
- Click WordPress Manager.
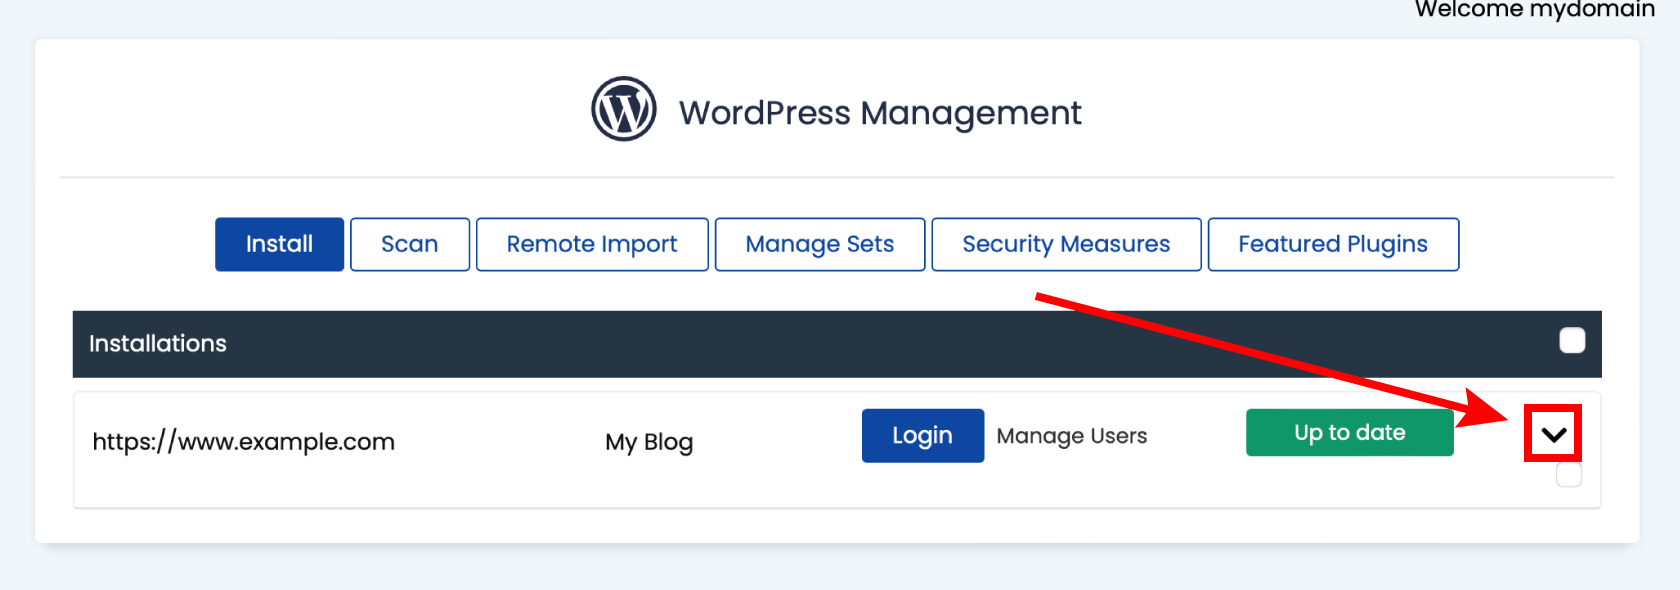
- Find your WordPress staging site and click the arrow to expand the options.
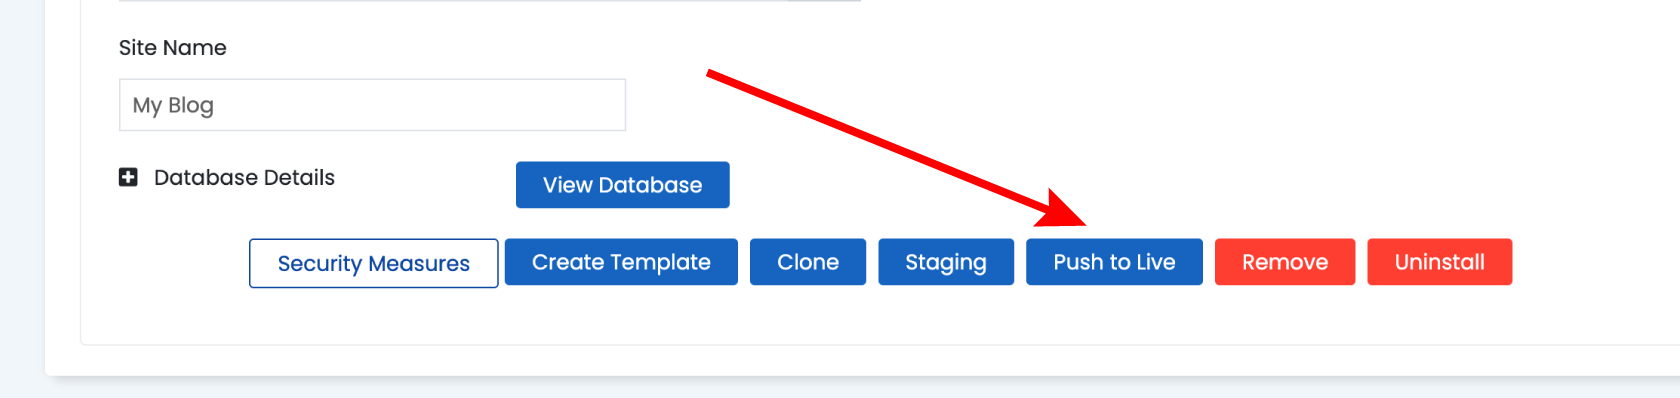
- Click Push to live
- Select your push options: The default push settings will replace all the files of your live WordPress site with the ones from your staging site and will erase the live WordPress database and import the database from your staging site. If you’re happy click Push to live.
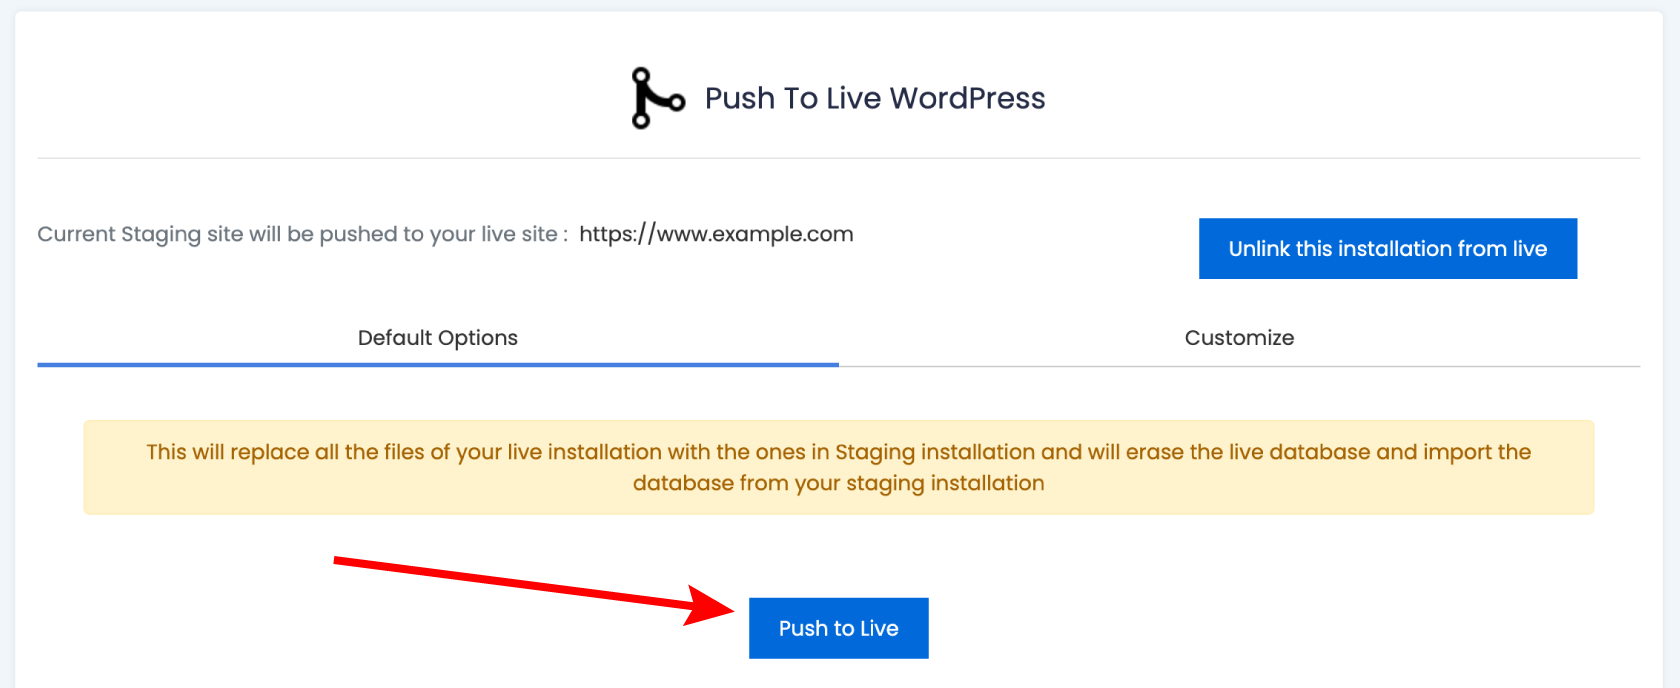
- Alternatively, click Customize and configure to overwrite just files, just the database, or selected database tables. When ready click Push to live.