WordPress’s Site Editor represents a significant evolution in how you can edit your website, offering a visual, block-based approach to editing your entire site. This guide will walk you through using the Site Editor effectively, with header and footer editing as practical examples.
The Site Editor is only available when you install and activate a Block theme on your site.
Accessing the Site Editor
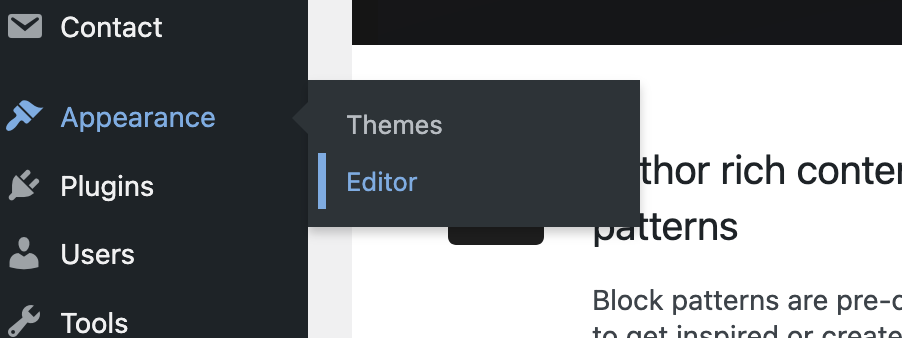
- Log in to your WordPress dashboard
- In the left sidebar, click on “Appearance”
- Select “Editor” to open the Site Editor
Understanding the Site Editor Interface
The WordPress Site Editor consists of several key components:
- Canvas: The main editing area where you see and modify your site
- Top Toolbar: Contains save options, undo/redo buttons, and view toggles
- Left Sidebar: Navigation menu for accessing different parts of your site
- Right Sidebar: Settings panel that changes based on what you’ve selected
Navigating the Site Editor
Using the Design Navigation Panel
The left sidebar contains a Design navigation panel with several important sections:
- Navigation: Manage and edit your site’s navigation menus
- Styles: Change colours, typography, and other design elements
- Pages: Edit individual pages on your site
- Templates: Modify page layouts like Home, Archive, or Single Post
- Patterns: Access reusable block patterns
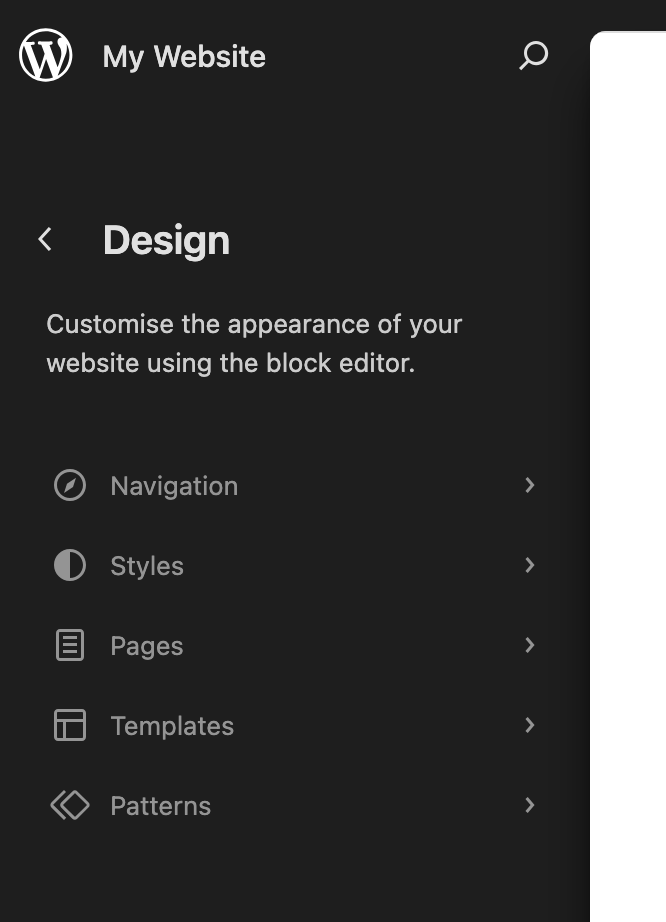
Each of these sections can be accessed by clicking on the corresponding item in the left sidebar.
Using the Search Function
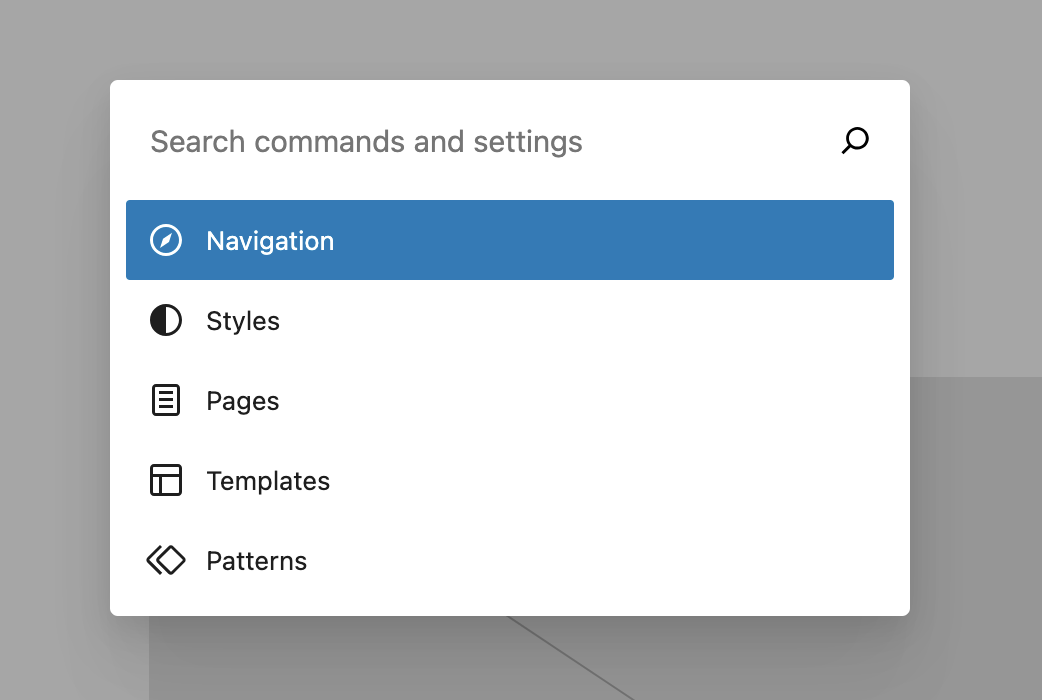
The magnifying glass icon in the top toolbar is a powerful navigation tool:
- Click on the magnifying glass icon
- Use the search bar to find specific templates, parts, or elements
- Results will show all matching items across your site
- Click any result to navigate directly to that element
Practical Example: Editing a Header
Let’s use header editing as an example of how the Site Editor works:
Using the Search Icon Method (Recommended)
- Click on the magnifying glass icon in the top toolbar
- Type “header” in the search field
- From the search results, select the header you want to edit
- You’ll be taken directly to the header in isolation for editing
- Click on any element (logo, menu, etc.) to modify it:
- Text elements can be edited directly
- Block settings appear in the right sidebar
- Additional options appear in the block toolbar above the selection
- To add new elements, click the “+” icon to open the block inserter
- Drag blocks to rearrange them within your header
- Click “Save” when finished
Alternative Method: Via Templates
- In the left sidebar, click on “Templates”
- Find and click on a template that includes a header
- Locate the header section at the top of the template
- Edit the header elements as described above
Working with Templates
Templates control the overall structure of different page types:
- In the left sidebar, click on “Templates”
- Choose the template you want to edit (Home, Archive, etc.)
- Modify any part of the template using blocks
- Templates often contain header and footer sections
- Changes to templates affect all pages using that template
Working with Template Parts
Template parts are reusable sections that appear across multiple templates:
- While editing a template, click on a template part (like a header or footer)
- You can edit the part directly within the template
- Changes to template parts will apply everywhere they’re used
- You can also create new template parts for reuse across your site
Using Blocks Effectively
The Site Editor uses the same block system as the Post Editor:
- Click the “+” icon to add a new block
- Search for specific blocks or browse categories
- Common blocks include:
- Paragraph: For text content
- Heading: For section titles
- Image: For pictures and graphics
- Navigation: For menus
- Group: For organizing multiple blocks together
- Each block has its own settings in the right sidebar
- Use the block toolbar for quick formatting options
Keyboard Shortcuts for Efficient Editing
Speed up your workflow with these shortcuts:
- Ctrl+K, or Cmd+K on Mac: Insert/edit links
- Ctrl+S, or Cmd+S on Mac: Save your changes
- Ctrl+Z, or Cmd+Z on Mac: Undo last action
- / (forward slash): Open block inserter
- Arrow keys : Navigate between blocks
- Escape** Esc: Clear selection or exit current mode
Practical Example: Customizing a Footer
Another example of Site Editor functionality:
Using the Search Icon Method
- Click on the magnifying glass icon in the top toolbar. Or Ctrl+K** (Cmd+K on Mac).
- Type “footer” in the search field
- Select the footer from the search results
- Click on existing elements to modify them
- Add new blocks like Social Icons, Site Title, or Copyright text
- Arrange blocks using drag and drop
- Use Group blocks to create columns or sections
- Adjust spacing, colors, and typography using the right sidebar
Working with Global Styles
The Site Editor allows you to set consistent styles across your site:
- Click on “Styles” in the left sidebar
- From here you can modify:
- Typography: Set font families and sizes
- Colors: Define your site’s color palette
- Layout: Adjust default spacing and dimensions
- Changes made here apply across your entire site
- You can also adjust styles for specific block types
Saving and Publishing Changes
When you’re done making edits:
- Click the “Save” button in the top-right corner
- Add a description of your changes (optional)
- Click “Save” again to confirm
- Your changes will be live on your site immediately
Troubleshooting Tips
- If elements aren’t appearing correctly: Check your block settings in the right sidebar
- If changes aren’t showing on your site: Clear your browser cache
- If you need to revert changes: Use the “Undo” button or restore a previous version
- If blocks aren’t behaving as expected: Try selecting a parent block by navigating up the block hierarchy
Advanced Features
As you become more familiar with the Site Editor, explore these advanced capabilities:
- Block Patterns: Pre-designed block layouts you can insert and customize
- Reusable Blocks: Create your own blocks to use across your site
- Template Creation: Design custom templates for specific content types
- Query Loops: Display dynamic content like post lists with filters
Make sure you checkout the officia WordPress Site Editor help guide for more tips.
